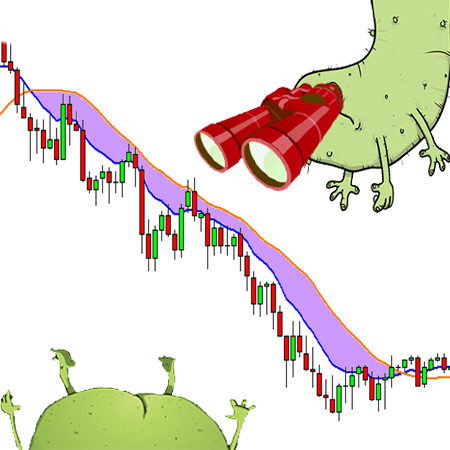
In this episode of Truth About FX, Walter digs into catching the correct support and resistance lines — or is there really one? According to Walter, it really depends on what your goal is and your biases. What is the most important thing to keep in mind when “tracking” your support and resistance? Does the timeframe matter? He also touches the line chart and how important it is to your trading.
Download (Duration: 05:56 / 6.80MB)
In This Episode:
00:33 – correct basis
02:19 – quietest period
03:32 – exceptional
05:11 – remove the noise
Tweetables:
Just go to the line chart. [Click To Tweet].
Use a higher timeframe. [Click To Tweet].
Where is spike going to go? [Click To Tweet].
Announcer: Sometimes, forex trading is a wild and wooly place to be. That’s why Hugh is here, to post your questions to Walter, the naked forex guy. Hugh’s got questions and Walter’s got the answers. Here at the Truth About FX Podcast.
Hugh: Hi, Walter. This trader is asking, “My biggest trading problem is finding the correct support and resistance lines.” So, how would you recommend they find the correct basis to put lines?
Walter: Well, it’s like trendlines. There are no correct unless you of course have asked Tom to mark. All jokes aside, here’s the thing, it depends on what you’re using on them for, to be honest, but I’ll get away from that. I don’t want to muddle the waters.
Let’s say that you look at the candle charts and you just say, “Woah! I don’t know what to do here. This is crazy. How do I find these lines?” So, what I would recommend is you just go to the line chart.
The line chart is essentially a one period moving average on the close. It’s connecting the dots of the closes, so that’s what the line chart does. If you do that, what that means is you’re support and resistance lines are going to be based on the close of the candles and not the wicks.
As some people would argue that with me and they would say, “Oh no, Walter. You’ve got to count the wicks because that’s how far price actually went.” Well, I like the idea of close.
I like the idea of, at the end of the day, what was basically settled on? For me, I like close. Everyone try to crack at Asia, took it where they could. London, took it where they could and then valley. New York, try their hand in there just kind of settles down and then gets there, depending on when your candles close on the daily chart. Either there’s the interbank period and then the market closes, or it’s like there’s the market closes and then there’s the interbank period. It depends on when you have 5 pm New York close or midnight GMT close but, doesn’t really matter.
The point is everyone has a go at it and it’s kind of settle around that interbank period when there’s an interbank trading going on which is the quietest period of the day for most days and that where one sells a lot.
So, I’m okay with close. I use closes in my systems and I understand why people think it’s crazy because close on a New York Stock Exchange stock is much… There’s something more behind it. Whereas, people are always arguing when the closes in forex so, I get that.
For me, if you’re having trouble drawing these lines, to me, just go to line chart. Drop in your lines zones that way. I’ll post a video on the shownotes if you want to see how I do it. Doesn’t make it magic or anything.
The other thing is go up one time frame, too. That’ll be in the video too. You’ll see where if you’re trading D1 charts, draw your zones on a W1. If you’re trading the H4 chart, draw your zones on the D1 and so forth.
That’s the other thing is that sometimes, if I have a zones on my chart — on my D1 chart for example — and almost everyday that the market touching the zone, then I know that my zones are too close.
Zoom out, draw them on the W1 because I only really want to take a trade when something exceptional happen which is basically the market hits a horizontal support and resistance zones.
It’s either going to bounce off of that and move away from it or it’s going to break through it to the other side so that’s really not going to happen everyday. For me, the two tips would be use the line chart which connects the closes and then use a higher timeframe.
Some people are going to connect the wicks but I find that the closes are better. The reason why too is it makes sense. Like, if you think about it, let’s say for the sake of argument, the Pound is up at a certain resistance level and it keeps trying to push through this resistance, keeps trying to trade higher, it spikes higher. You see, you actually get a wick, higher than the zone then it comes back down and closes below it.
The next day, it does the same and still can’t get up there. Well, to me, the real important level is the one that can’t close above. You know what I mean? It’s not that the fact that yesterday it spiked 20 pips higher than it did today or whatever. That doesn’t really matter.
To me, what really matters is where is spike going to go and to me, I see it more easily, more readily if in fact I can see that it can’t quite get through that level. What I mean by that, it can’t close beyond that level so that’s what I would do but it’s… Obviously, beauty is in the eye of the beholder.
I mean, everyone has got to decide to do something different but to me, using the closes, using a higher time frame, using a line chart, those are the things that I would do.
Hugh: Yeah and I want to thank you because you showed me that and it helps a lot. I know it has helped other traders also. It does really help to remove the noise, right?
Walter: Yeah, that’s awesome. That’s great. It’s a cool way to see it. It’s an easier way. I guess it’s kind of like an x-ray. That’s why I see it, it’s like an x-ray. You don’t see all the blob and stuff it’s like, “Oh, I look like a handsome skeleton” or whatever. You know what I mean?
I’m glad that it helped people. That’s awesome and again if this concept is new to you, just go down to the shownotes and watch the video and you’ll get it right away.
Hugh: Cool, Walter. Thanks.
Walter: Okay, thanks.
Hugh: See you.
Walter: See you.
SHOWNOTES
“How to Draw Support and Resistance Zones” Video
Podcast: Play in new window | Download
Subscribe: Apple Podcasts | Android | RSS